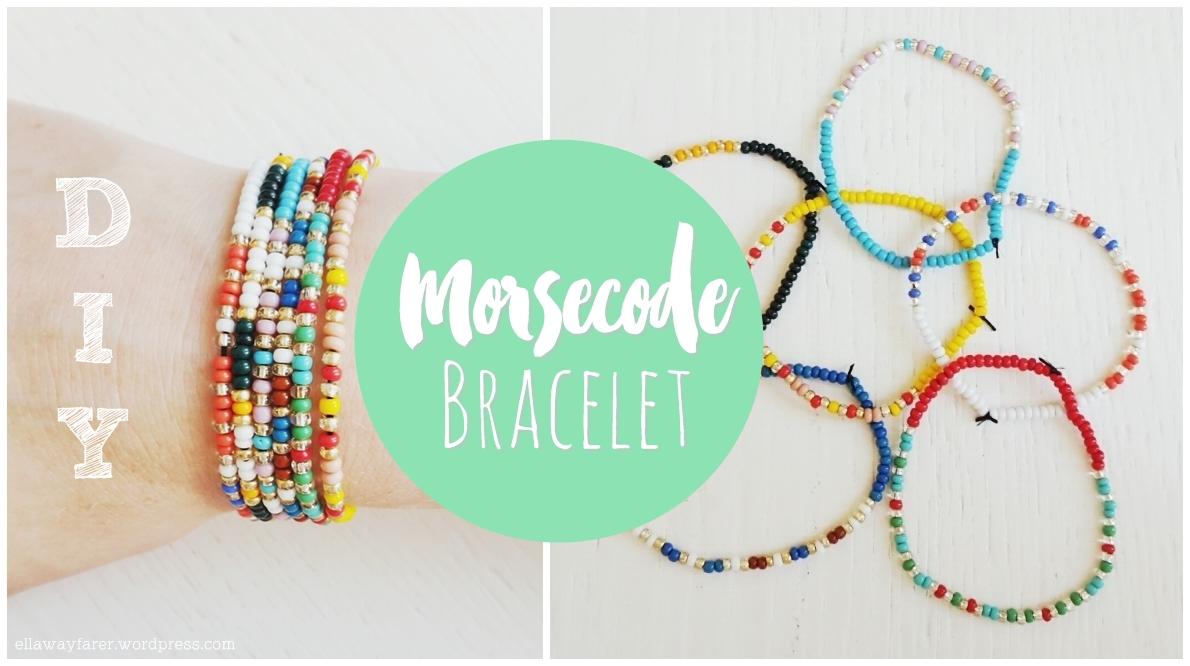
DIY | How to make MORSECODE BRACELETS
I found this super sweet DIY a while ago on Erika’s Blog HWTF and I just have to share it with you. You can find these cute morsecode bracelets all over Etsy and DaWanda, but you can eeeeaaasily make them yourself! I’ll explain to you how that works 🙂
Dieses süße DIY habe ich schon vor einer Weile auf Erikas Blog HWTF gefunden und muss es dir unbedingt mal zeigen. Diese Armbändchen mit Morsecode findet man gerade viel auf Etsy oder DaWanda, aber du kannst sie dir auch ganz einfach selber basteln! Ich erklär dir, wie’s funktioniert 🙂

- some elastic
- coloured beads (mine are ∅ 2,6mm)
- golden or silver beads (same size as above)
- morsecode translator
- Gummiband
- bunte Perlen (meine sind ∅ 2,6mm von Rayher, hier oder bei Müller)
- goldene oder silberne Perlen (Rayher, hier oder Müller – diese verlieren aber bei vielen Tragen die goldene Farbe)
- Morsecode Übersetzer
LET’S GO
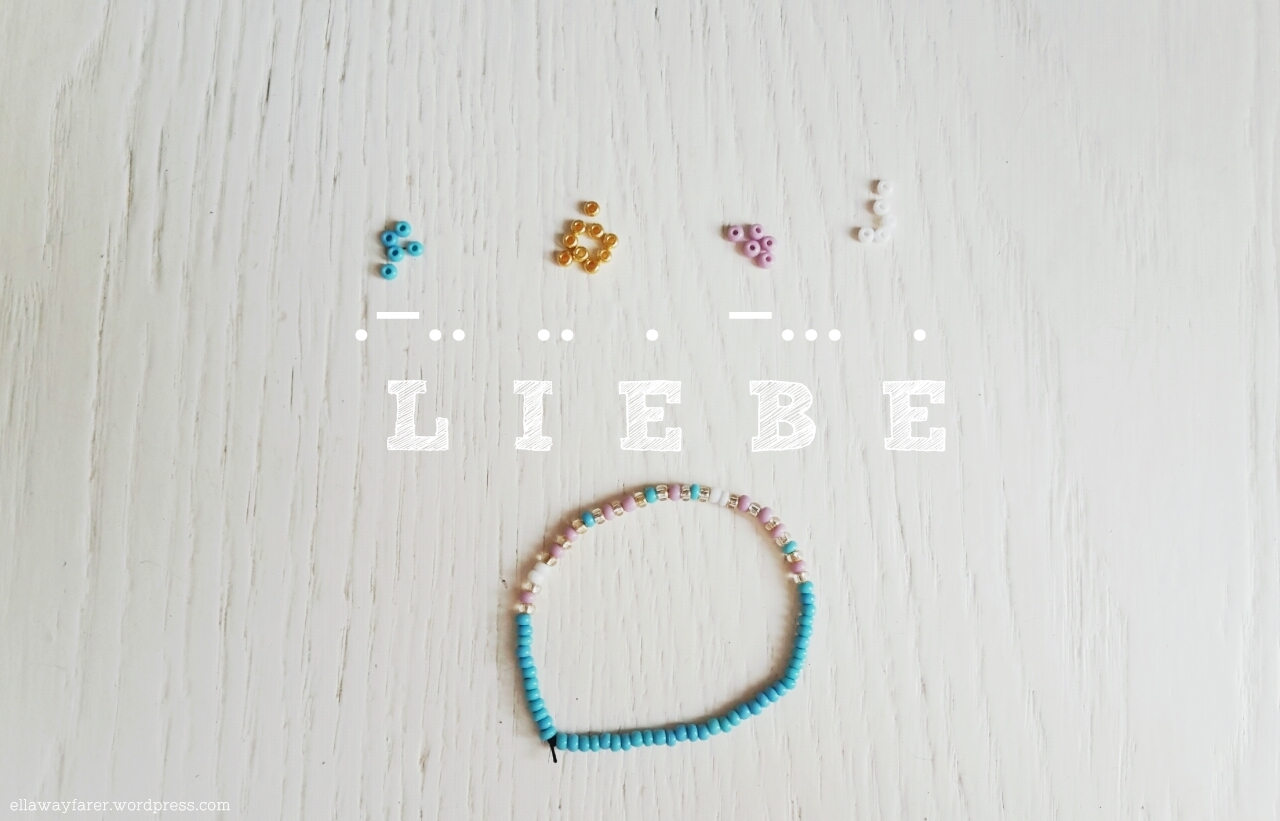
First you have to choose the word you want to wear around your wrist. Here I made the German word for love: LIEBE. Go to the morsecode translator and let it translate into dots and dashes. It shouldn’t be too long, otherwise it’s gonna be a necklace 😉
Als erstes musst du dir das Wort aussuchen, welches du an deinem Handgelenk tragen möchtest. Hier habe ich LIEBE ausgewählt. Lass es dir vom Morsecode Übersetzer in kleine Striche und Punkte übersetzen. Das Wort sollte nicht allzu lang sein, sonst wird’s wohl eher eine Kette 😉

Now you’ll need 4 colours: a base colour of your bracelet, one for the gaps, one for the dots and one for the lashes. As I had a big mixed box of beads I gathered some before I started beading.
Jetzt brauchst du 4 Farben: eine Basisfarbe für dein Armband, eine für die Lücken, eine für die Punkte und eine für die Striche. Da ich eine große Box mit bunt gemischten Perlen hatte, habe ich mir vorher ein paar zusammengesucht bevor ich mit dem Auffädeln angefangen habe.
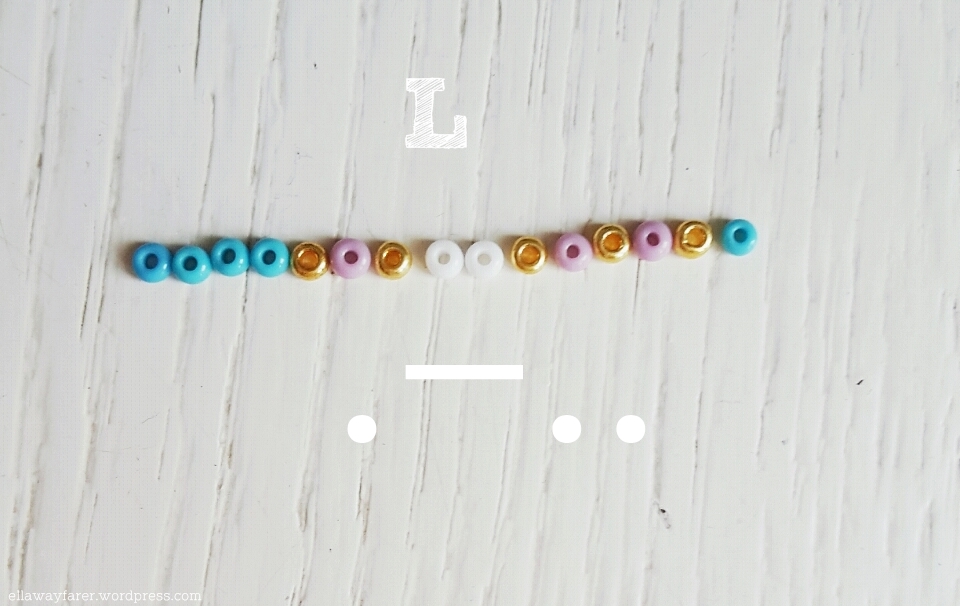
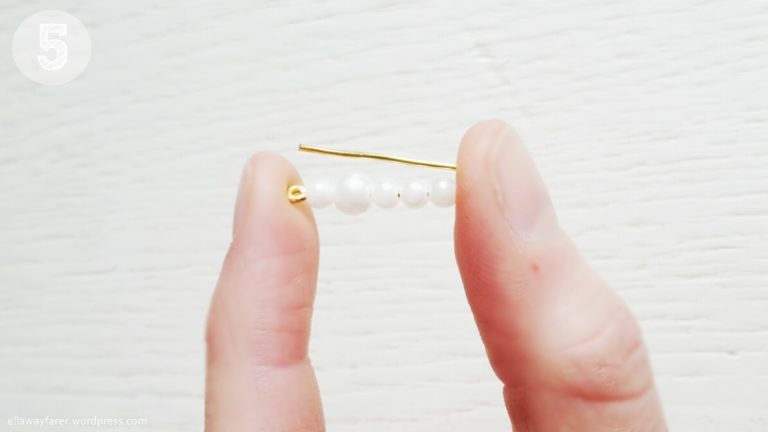
For the L for example it will look like this. You start with the base colour and then „introduce“ a new letter with gold, which will also separate the dots and dashes from each other, and then you „say goodbye“ to the letter with another golden bead. Separate the letters with one (or more if your word is very short) base colour bead and do the same with the next letter.
Bei dem L sieht das dann so aus. Du fängst mit der Basisfarbe an und „begrüßt“ dann einen neuen Buchstaben mit einer von den goldenen Perlen, welche dann auch die Punkte und Striche voneinander trennen werden. Und dann „verabschiedest“ du den Buchstaben wieder mit einer goldenen Perle. Die Buchstaben trennst du dann wieder mit der Basisfarbe voneinander (je nachdem, wie lang dein Wort ist eine oder mehrere) und startest dann das ganze von vorn mit den nächsten Buchstaben.
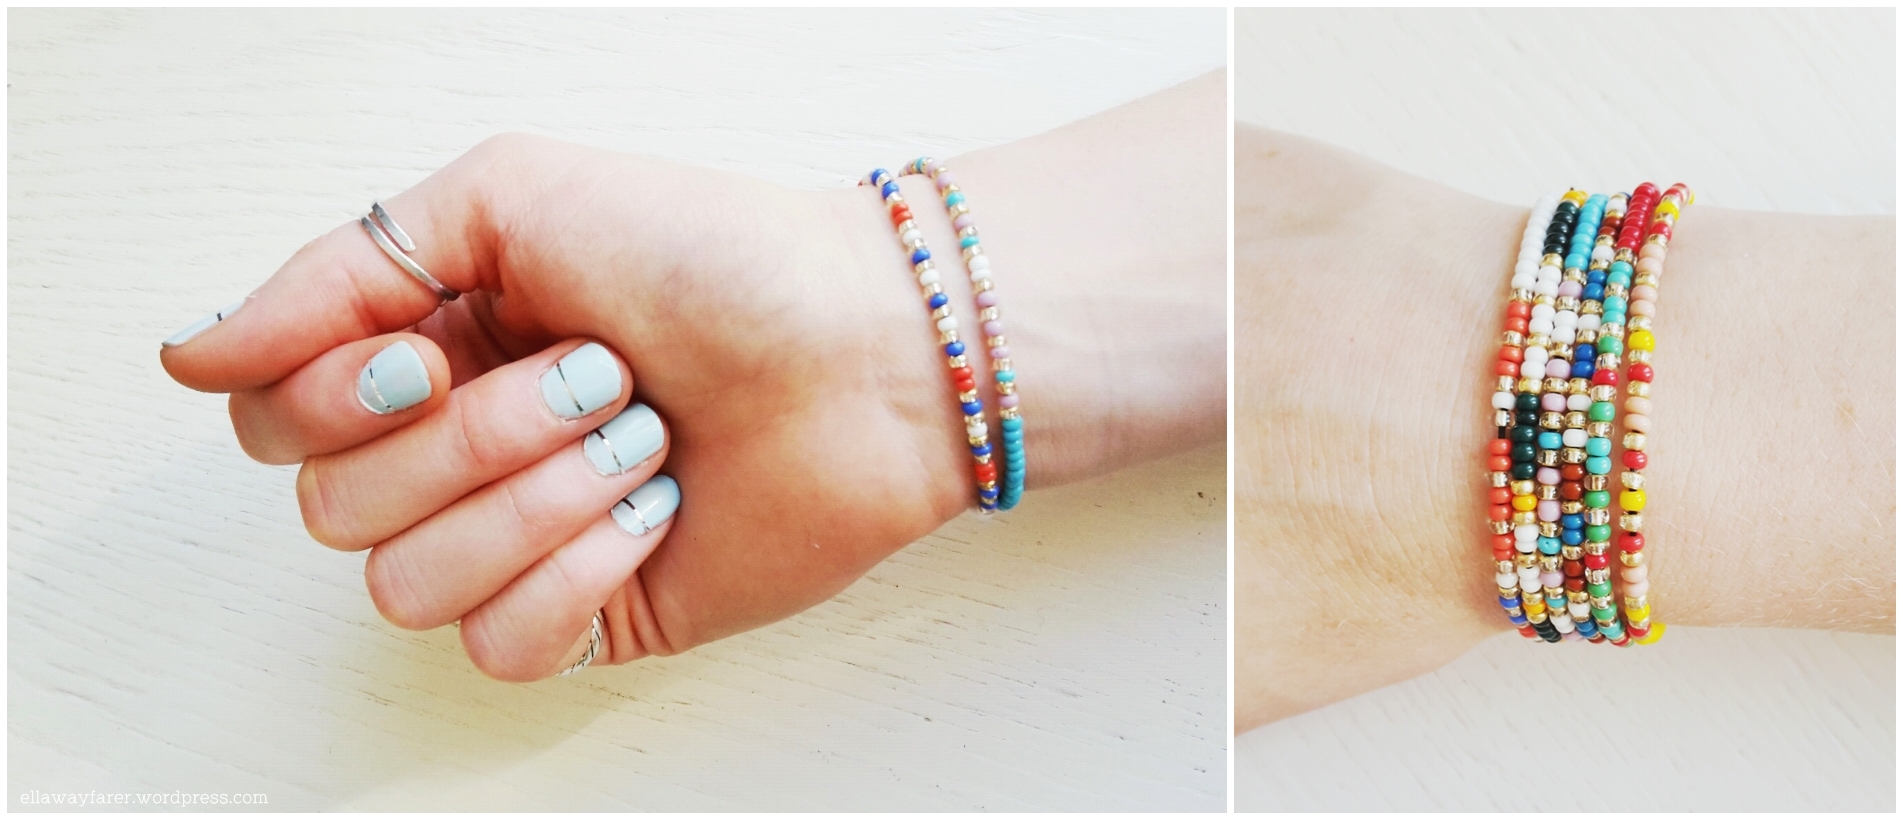
I made a few of them with different words in English and German. You can wear them aaaaall together or you only take the words you’ll need for the day. On the left I’m wearing „LOVE“ and „FRIENDS“ ♥
They are also a very nice personalised gift for friends or family, you can also „bead“ their names for a birthday or so 🙂
Ich habe ein paar solcher Armbändchen mit deutschen und englischen Wörtern gemacht. Entweder du trägst aaaalle zusammen oder du nimmst nur die Wörter, die du für den Tag brauchst. Auf dem linken Foto trage ich „LIEBE“ und „FREUNDE“ ♥
Außerdem sind die Bändchen auch wunderschöne personalisierte Geschenke für Freunde und Familie, du kannst zum Beispiel auch ihre Namen zum Geburtstag „auffädeln“ 🙂