DIY | Happy Cloud Mobile for Babies and Kids
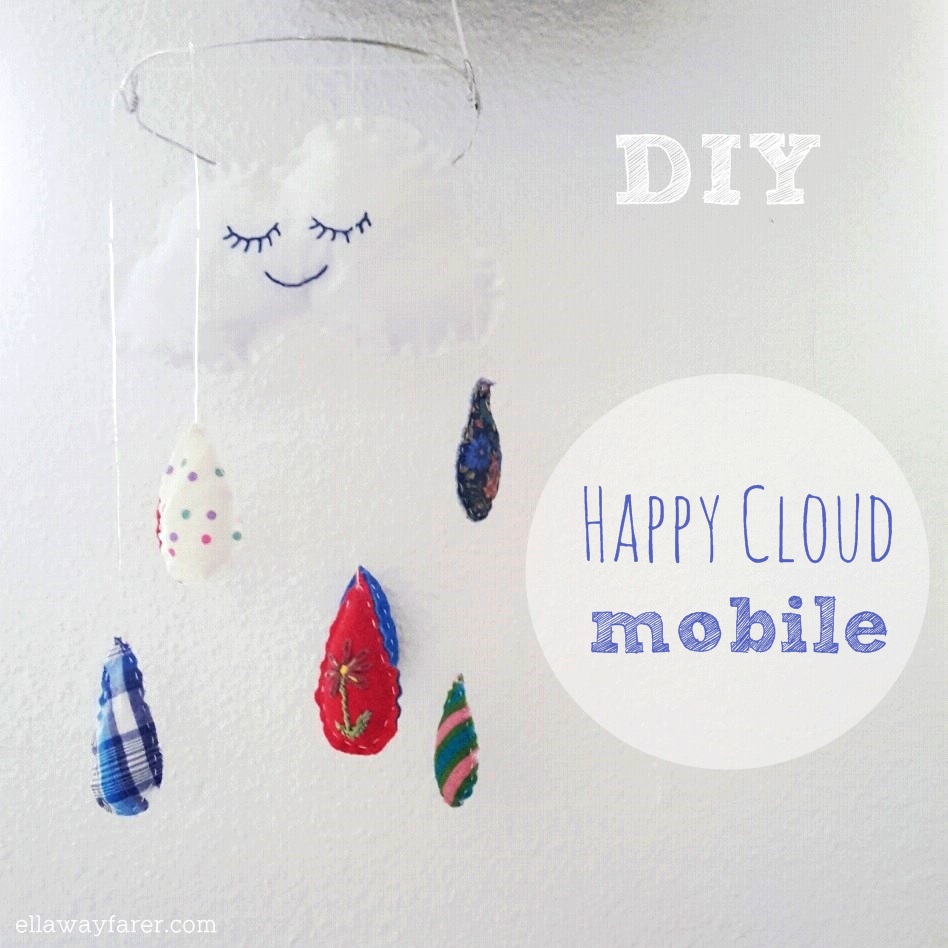
I am so happy that two very dear friends of mine became mommies this year!!! If you haven’t seen it already, I also made a Henna Tattoo for a baby belly for one of them. To welcome those little things into this colourful world, I decided to make mobiles for them. So this is the first one!
I’ll tell you how to make this cute Happy Cloud Mobile and you will get a FREE PRINTABLE PATTERN for all the parts you need 🙂 So let’s go and make babies happy!
Es ist so schön, dass zwei meiner liebsten Freunde dieses Jahr Mamis werden!!! Wenn du es noch nicht gesehen hast, einer durfte ich auch ihren Schwangerenbauch mit Henna verzieren. Um die kleinen Wesen in diese bunte Welt zu begrüßen, habe ich mir überlegt Mobiles für sie zu basteln. Das ist also das erste!
Ich erklär dir, wie du dieses süße Happy Cloud Mobile machen kannst und du bekommst ein MUSTER ZUM AUSDRUCKEN für alle Teile, die du dafür brauchst 🙂 Also auf geht’s zum Babys glücklich machen!
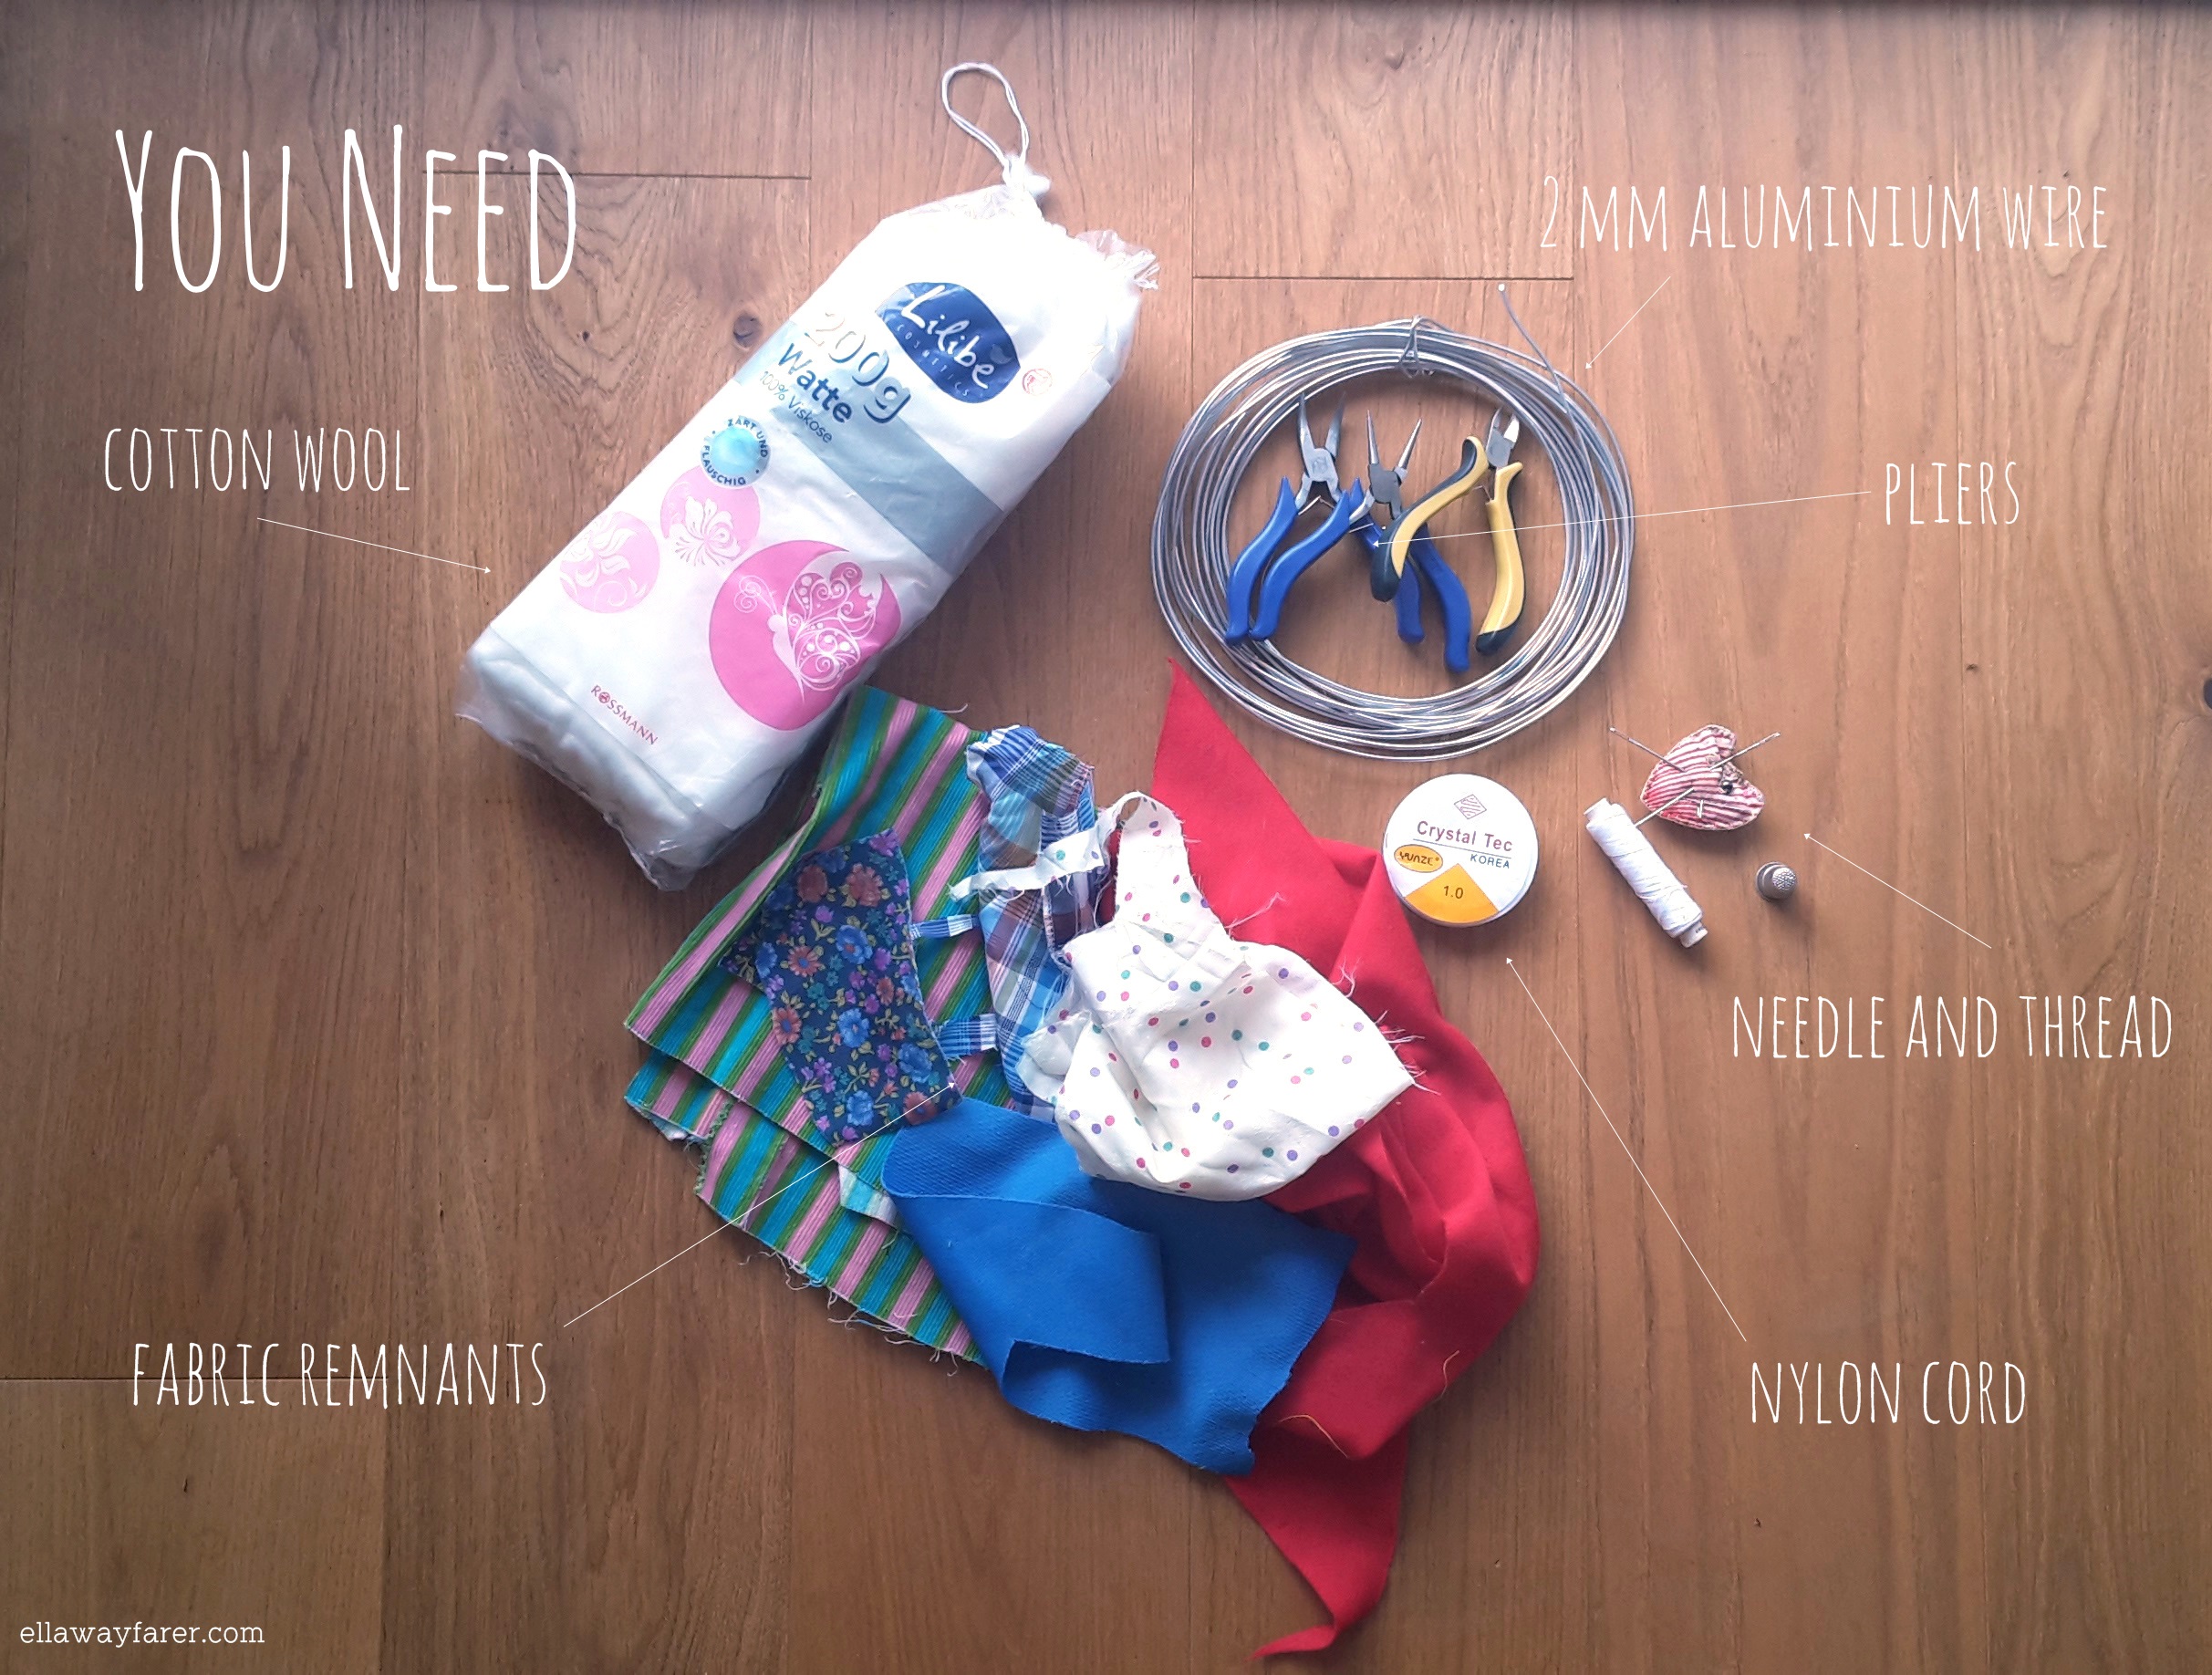
- Watte
- Stoffreste
- Zangen
- 2 mm Aluminiumdraht
- Nähzeugs
- Nylonfaden
LET’S GO

First you’ll need pliers and the wire. To make this frame follow the instructions HERE, it’s almost the same, only bigger. I used a kitchen pott to measure the size roughly. Then cut out as many little drops as you want to have.
Als erstes brauchst du Zangen und Draht. Um den Rahmen anzufertigen, musst du nur DIESER Anleitung folgen, es ist fast das gleiche, nur etwas größer. Ich hab einen Topf benutzt, um die Größe grob abzumessen. Dann schneidest du so viele kleine Tropfen aus, wie du möchtest. Don’t forget: you always need two sides.
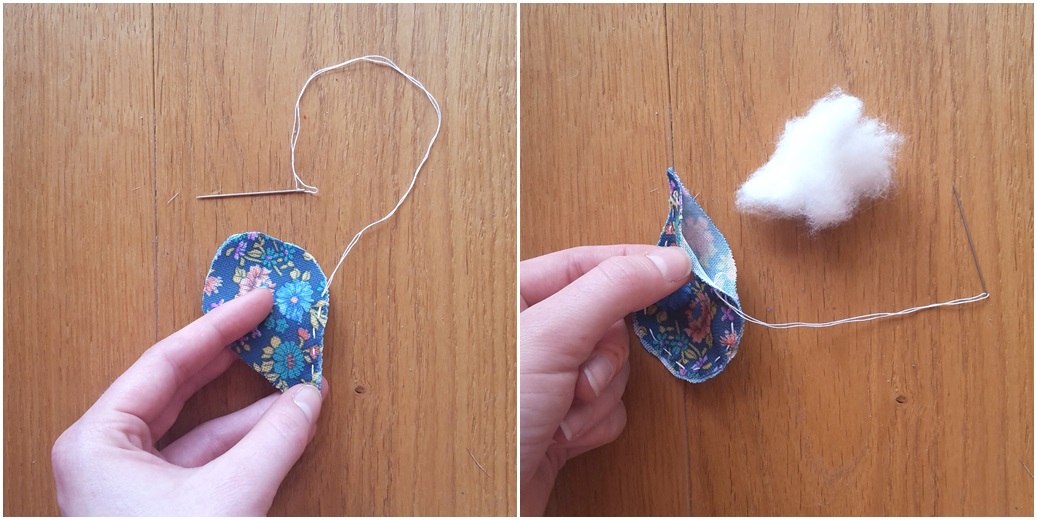
Then start sewing the drops together. Leave a little space before you close it and fill the drop with cotton wool. I decided to handstitch everything and have visible stitches, because it gives the mobile a more childlike look.
Dann beginnst du die Tropfen zusammenzunähen. Bevor du sie schließt, lass eine kleine Lücke und füll den Tropfen mit Watte. Ich habe mich dazu entschieden alles mit der Hand zu nähen und die Nähte außen und sichtbar zu lassen, weil es dem Mobile einen kindlicheren Look gibt.
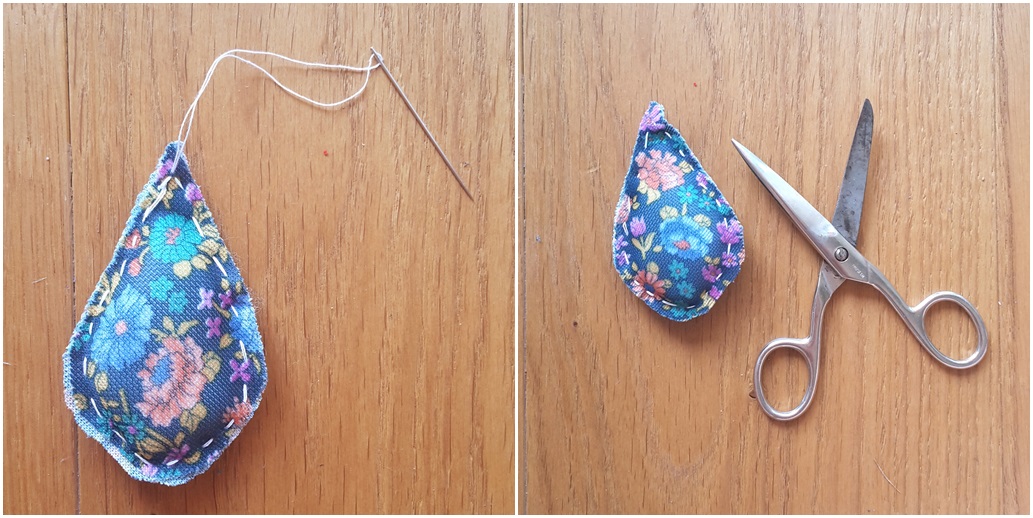
After closing the drop you can trim the edges a bit so that the fabric has the same lenght and looks neater.
Nachdem du den Tropfen zugenäht hast, kannst du die Kanten noch etwas trimmen, damit der Stoff außen gleichlang ist und ordentlich aussieht.
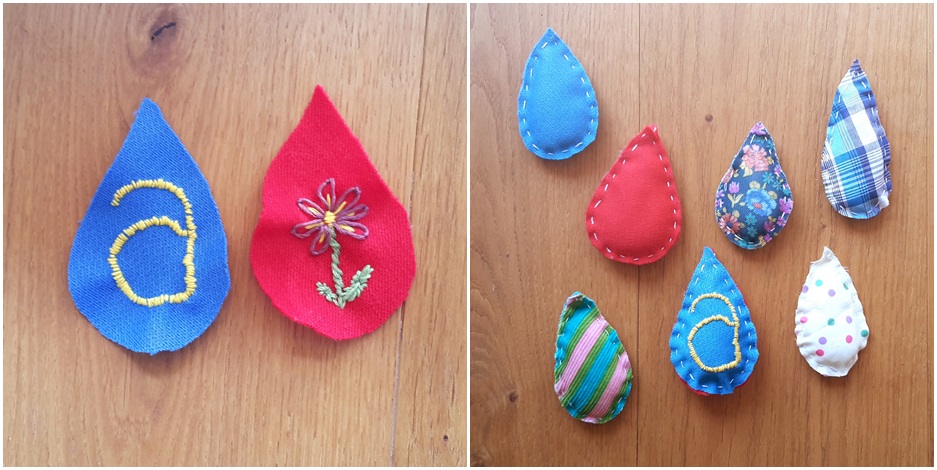
To make it more individual I tried to embroider one drop… My first time doing embroidery… But hey, little Arthur will surely like the small flower and his parents will know that the A stands for his name 😀
Um es etwas mehr zu personalisieren habe ich den Versuch gewagt, einen Tropfen zu besticken… Das erste Mal besticken… Aber hey, der kleine Arthur wird die kleine Blume bestimmt süß finden und seine Eltern wissen, dass das A für ihn ist 😀

Then cut out two clouds. On one side you can embroider a cute face. The happy face is pretty easy, too. I used the back stitch for the mouth and the blanket stitch for the eyes and lashes. THIS TUTORIAL is wonderful to learn. Then fill the cloud with cotton wool and sew both sides together.
Dann schneidest du noch zwei Wolken aus. Eine Seite kannst du dann mit dem glücklichen Gesicht besticken. Das ist auch sehr einfach zu nähen. Ich habe den Mund mit einem normalen Steppstich gemacht und für die Augen und Wimpern den Langettenstich verwendet. In diesem englischen Tutorial sieht man es sehr gut. Jetzt füllst die Wolke noch mit Watte und nähst sie zusammen.

Then you only need to tie one end of the nylon cord with 2 tight knots to the wire frame. Thread the other end to a drop and make 2 knots there, too, to fix it. The same with the cloud and teh rest of the drops. Now you only need some thread or emboidery floss to thread through the hoops at the frame and you can hang it up over the baby’s bed 🙂
Jetzt musst du nur noch ein Ende des Nylonfadens mit 2 festen Knoten an dem Drahtrahmen befestigen. Das andere ende fädelst du durch einen Tropfen und machst wieder 2 Knoten, damit er fest hält. Das selbe machst du mit allen Tropfen und der Wolke. Jetzt brauchst du nur noch etwas Faden oder Sticktwist, um es durch die Schlaufen am Drahtrahmen zu fädeln und du kannst es über das Babybett hängen :)